This one has been on the bench for a while. I wanted to mount the detached head of my TYT TH-7900 dual-band (2m / 70cm) radio cleanly into the center console of my 2001 Land Rover Range Rover P38, instead of having it hanging off a bracket or floating around on the seat. The P38 has a particular dash/console layout, and there is no off-the-shelf mount made for the TH-7900 that drops into it. So, like a lot of P38 problems, the answer was: print one.
The catch is that I am not a CAD person. I can find my way around Tinkercad enough to combine and trim shapes, but I am not designing parametric panels from scratch. So I leaned on what other people had already done.
The Two Thingiverse Files
The mount is a mash-up of two existing models from Thingiverse:
- Thing:6600298 — the panel/face that fits the Range Rover P38 console opening.
- Thing:3579528 — the bracket/cradle that the TYT TH-7900 detached control head mounts to.
Big thanks to both creators. Without those two files, this whole project does not happen. I just needed a way to glue them together into a single printable part.
Tinkercad, the Hard Way
I imported both STLs into Tinkercad, lined them up roughly where they needed to live relative to each other, and started welding them into one body. This is where it gets ugly. There is a lot of trial and error: scoot the bracket, re-export, hold it up to the dash, realize the head sits a few millimeters too proud, re-import, scoot it again. I went through several versions before I had something that actually fit and held the head where I wanted it.
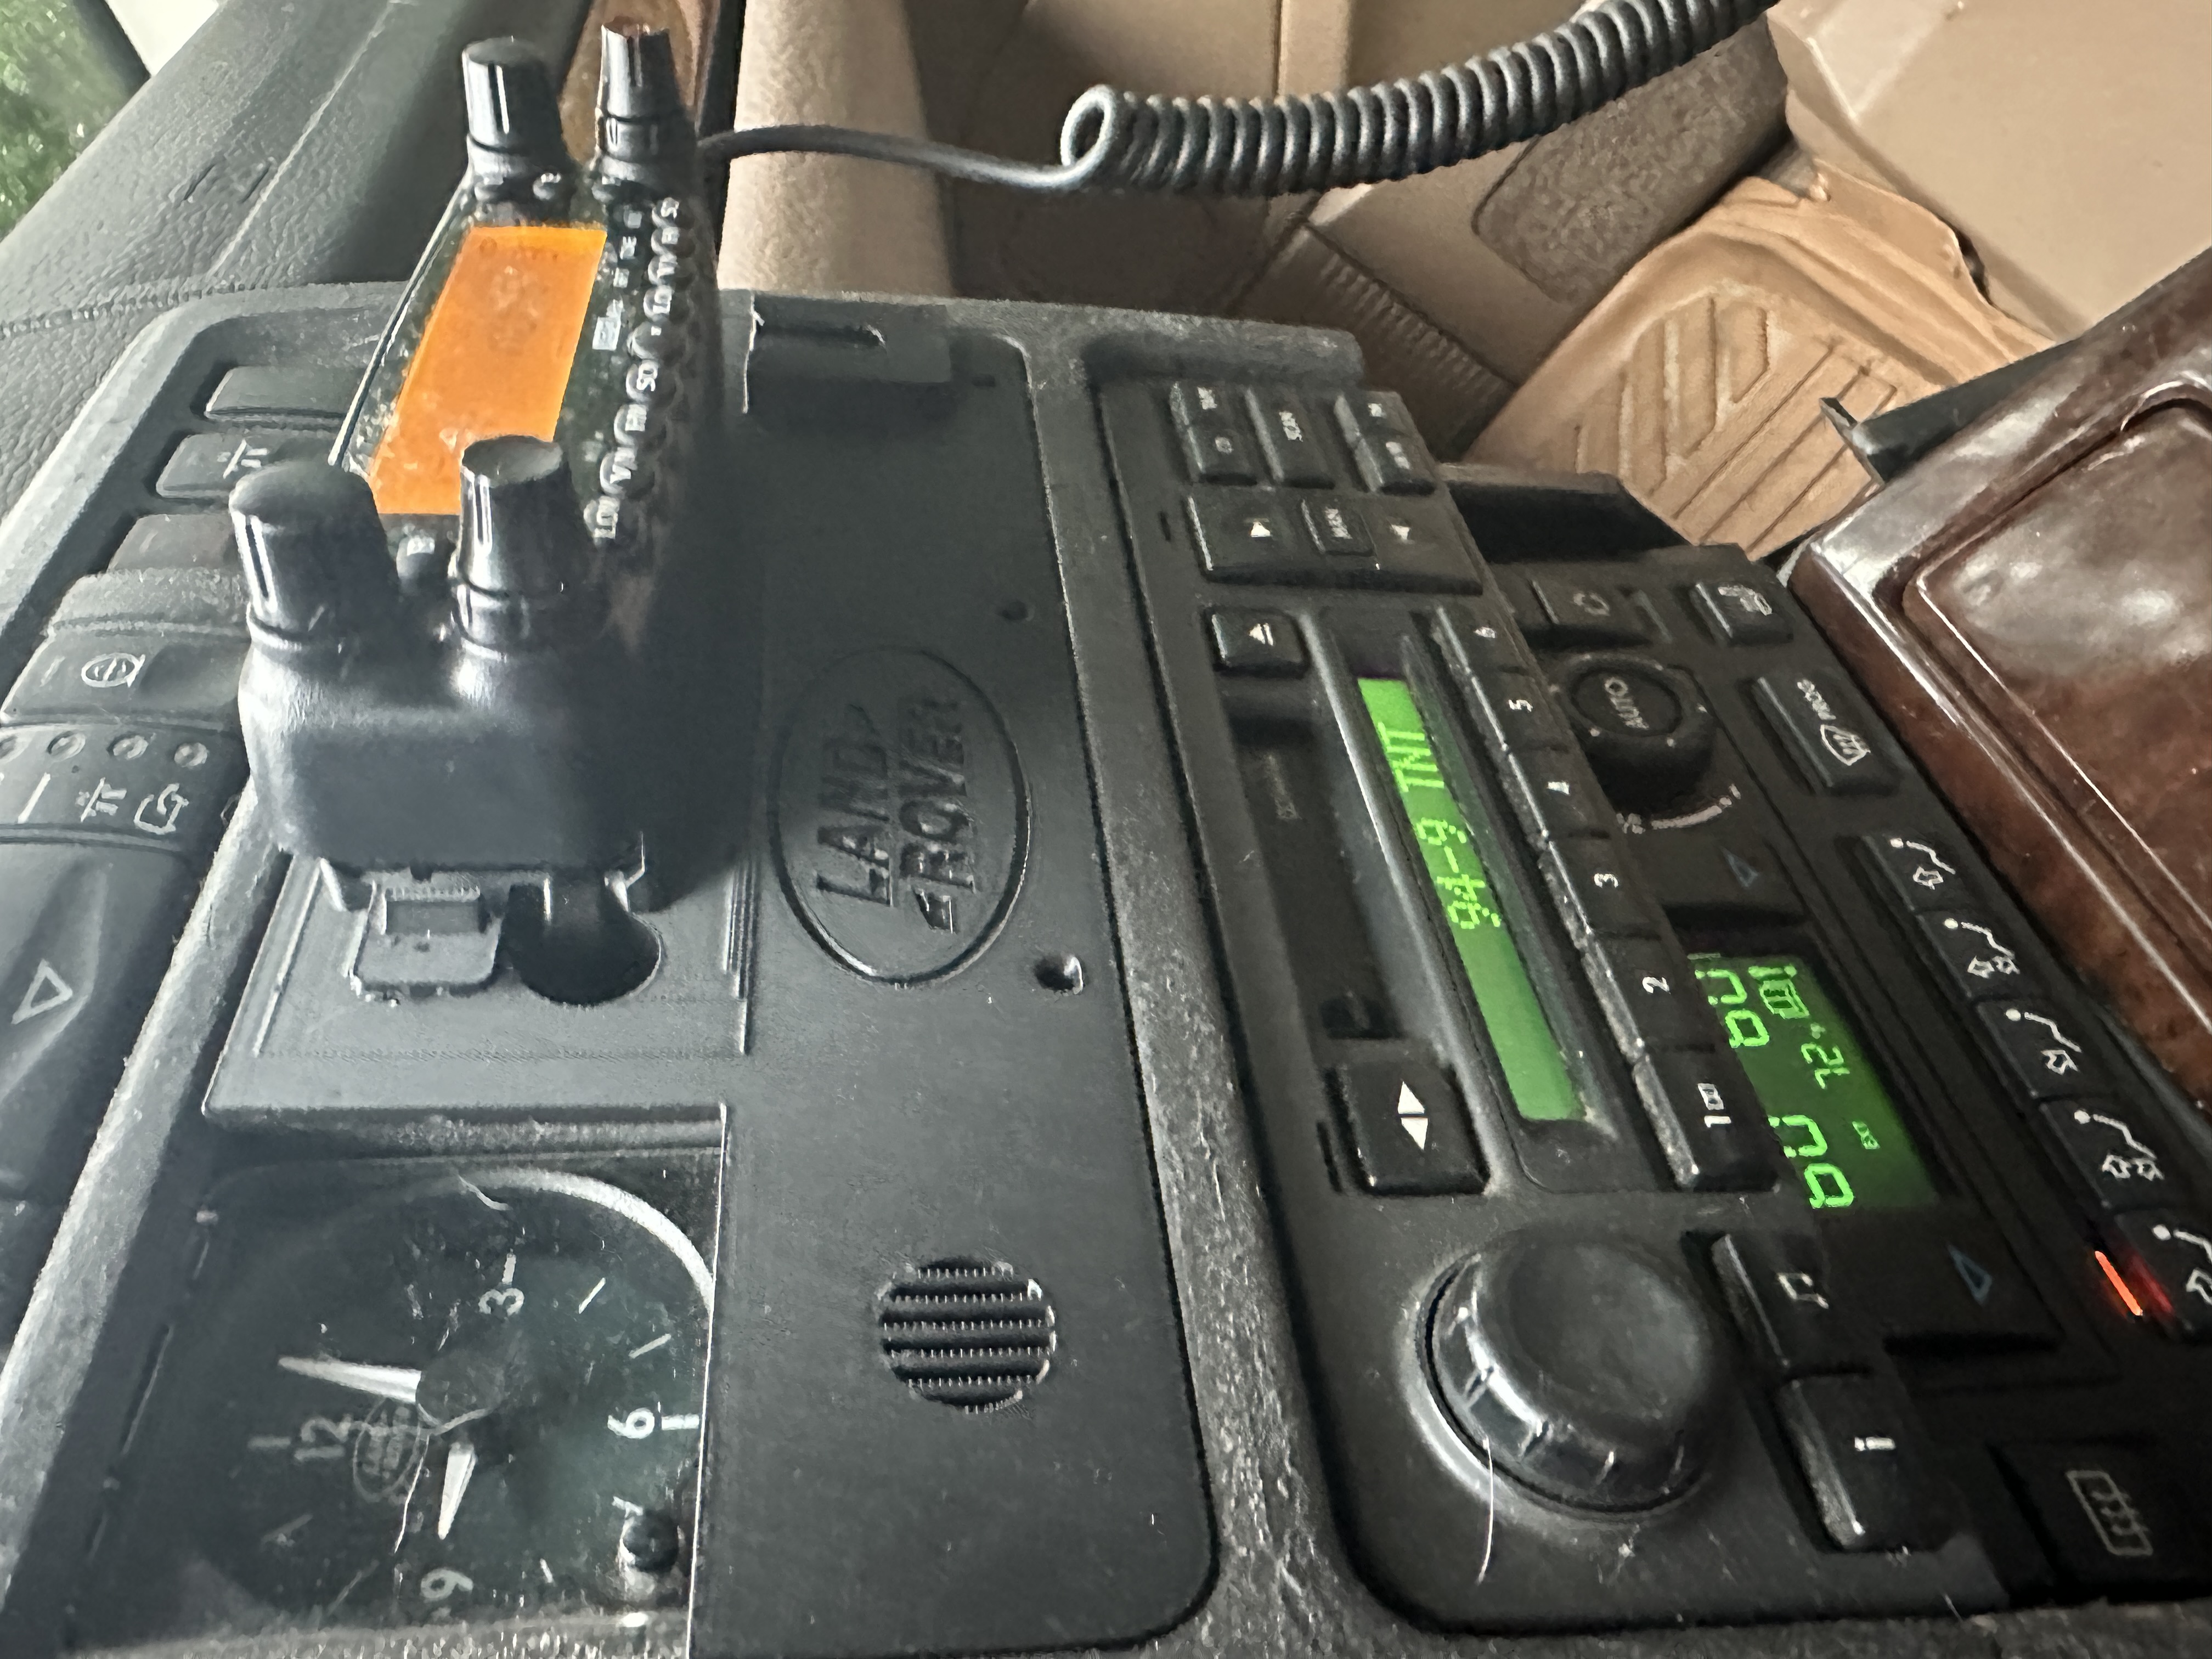
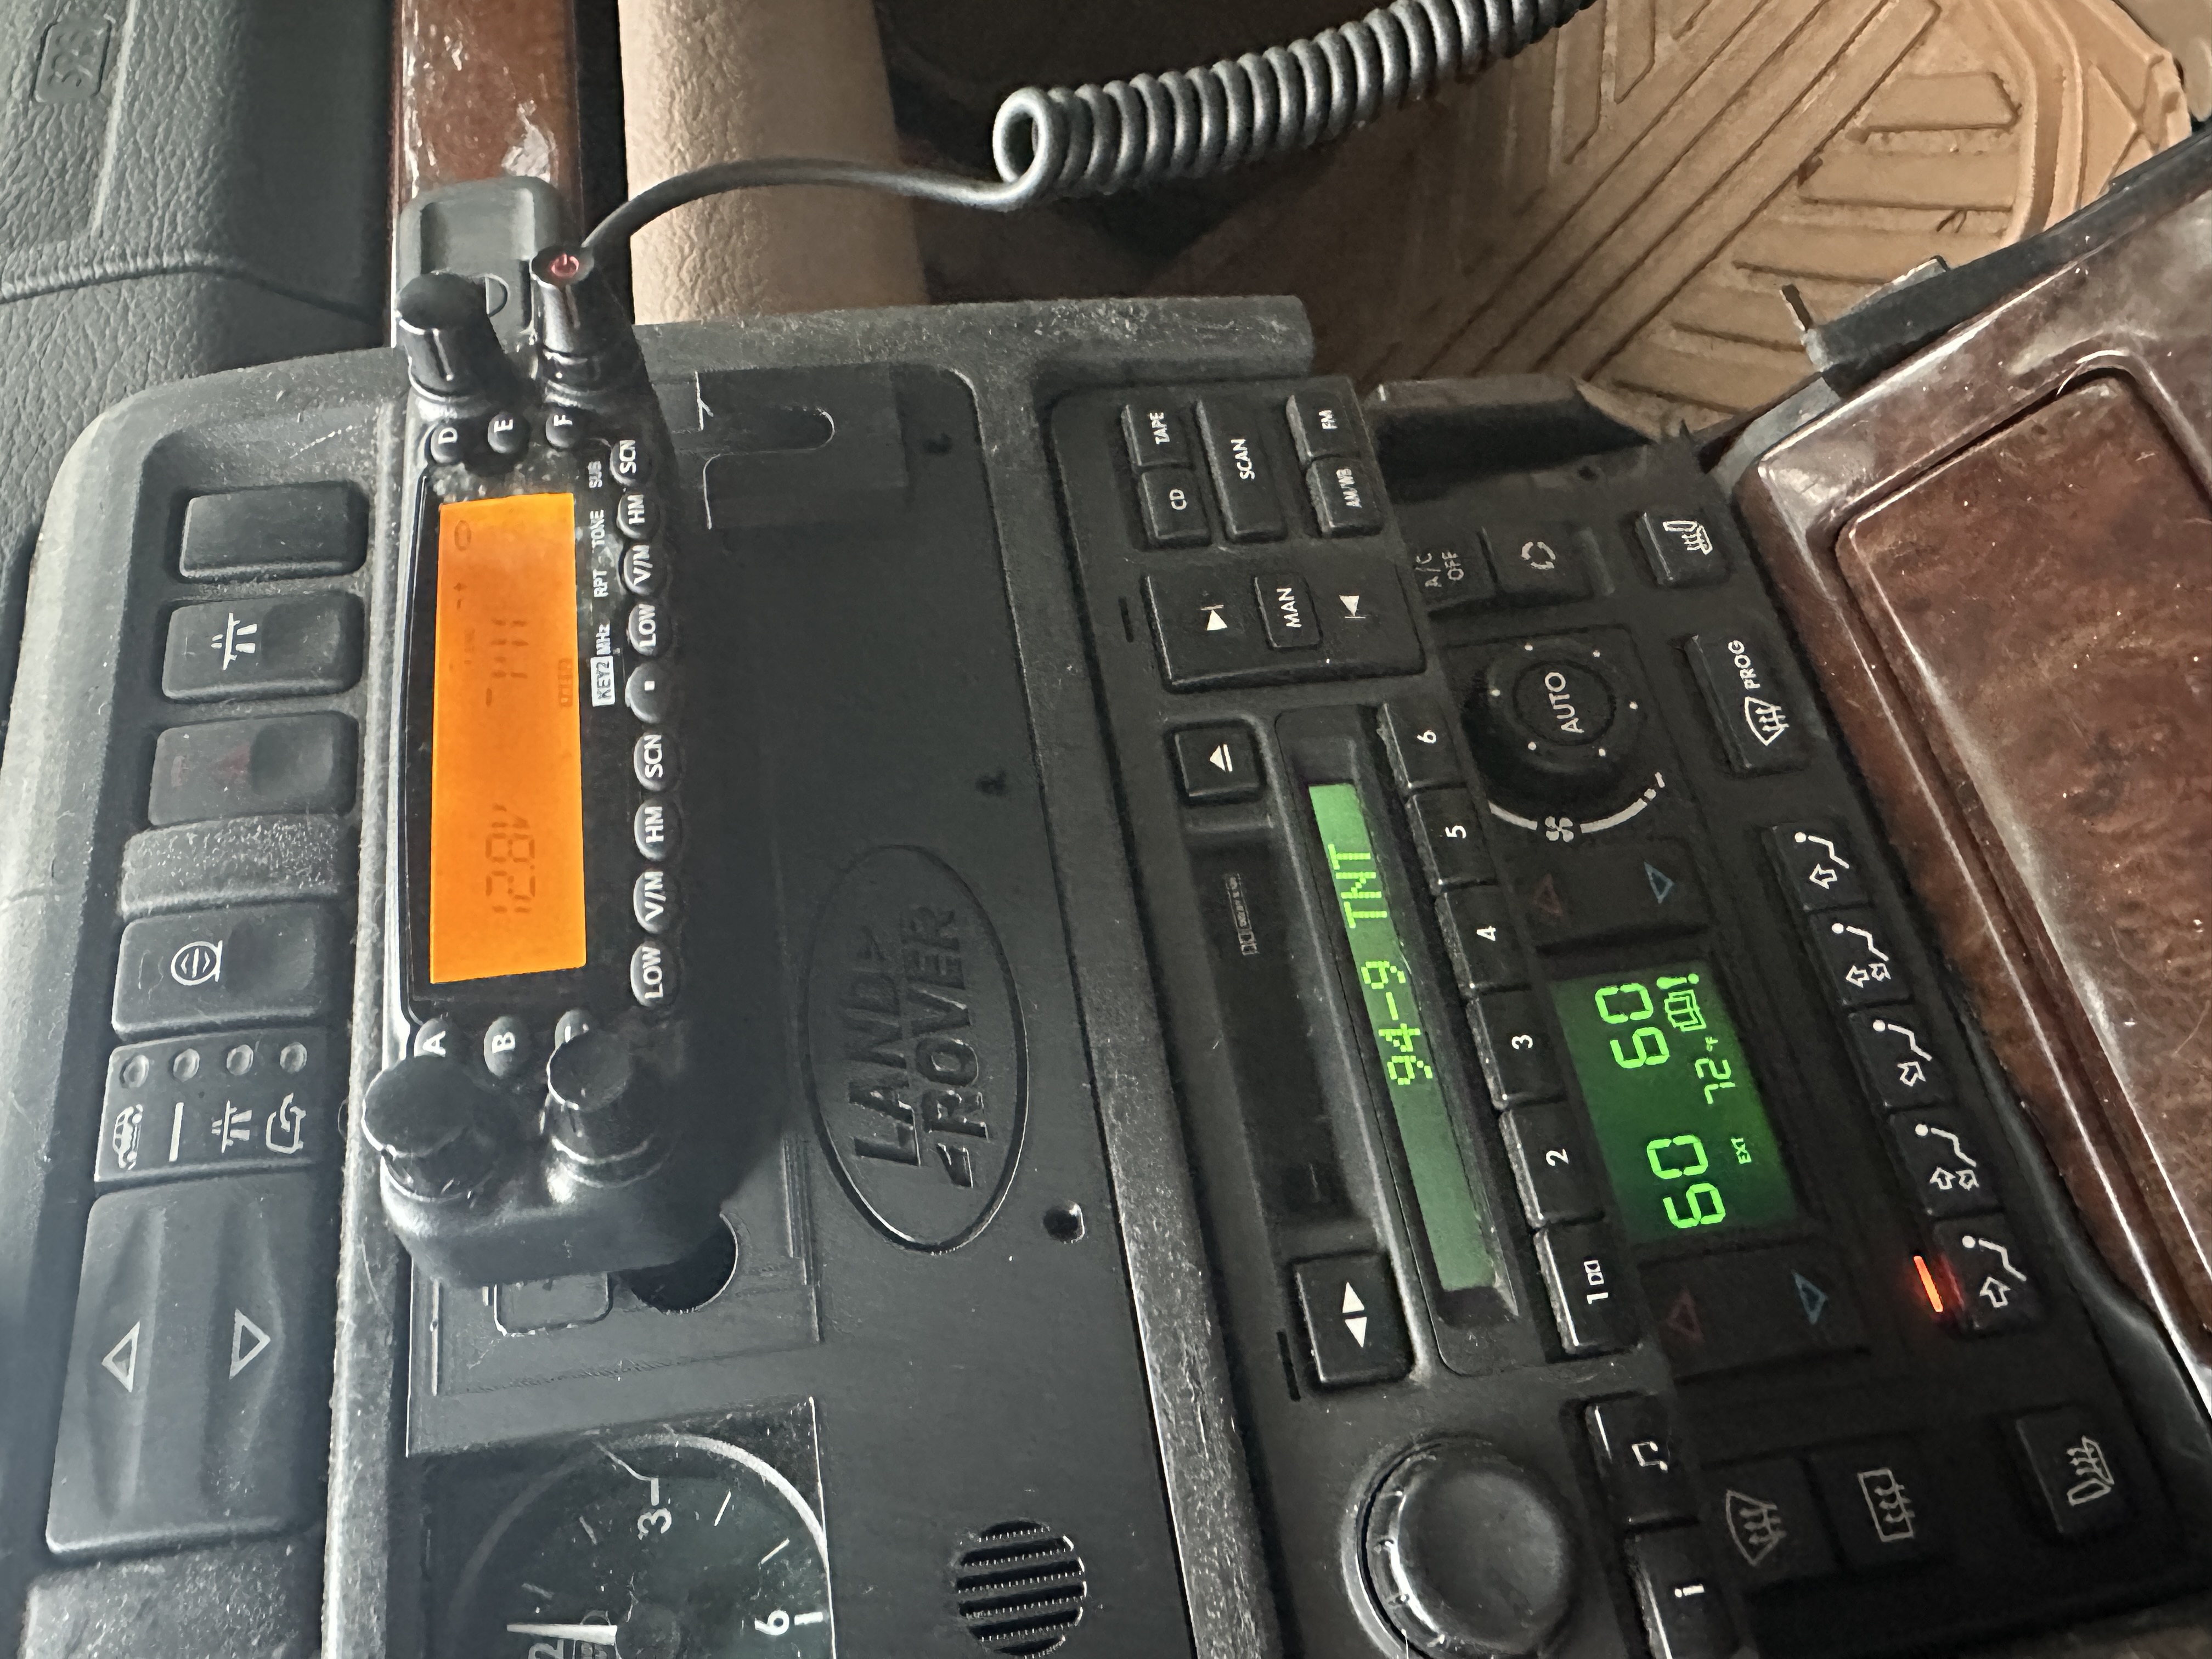
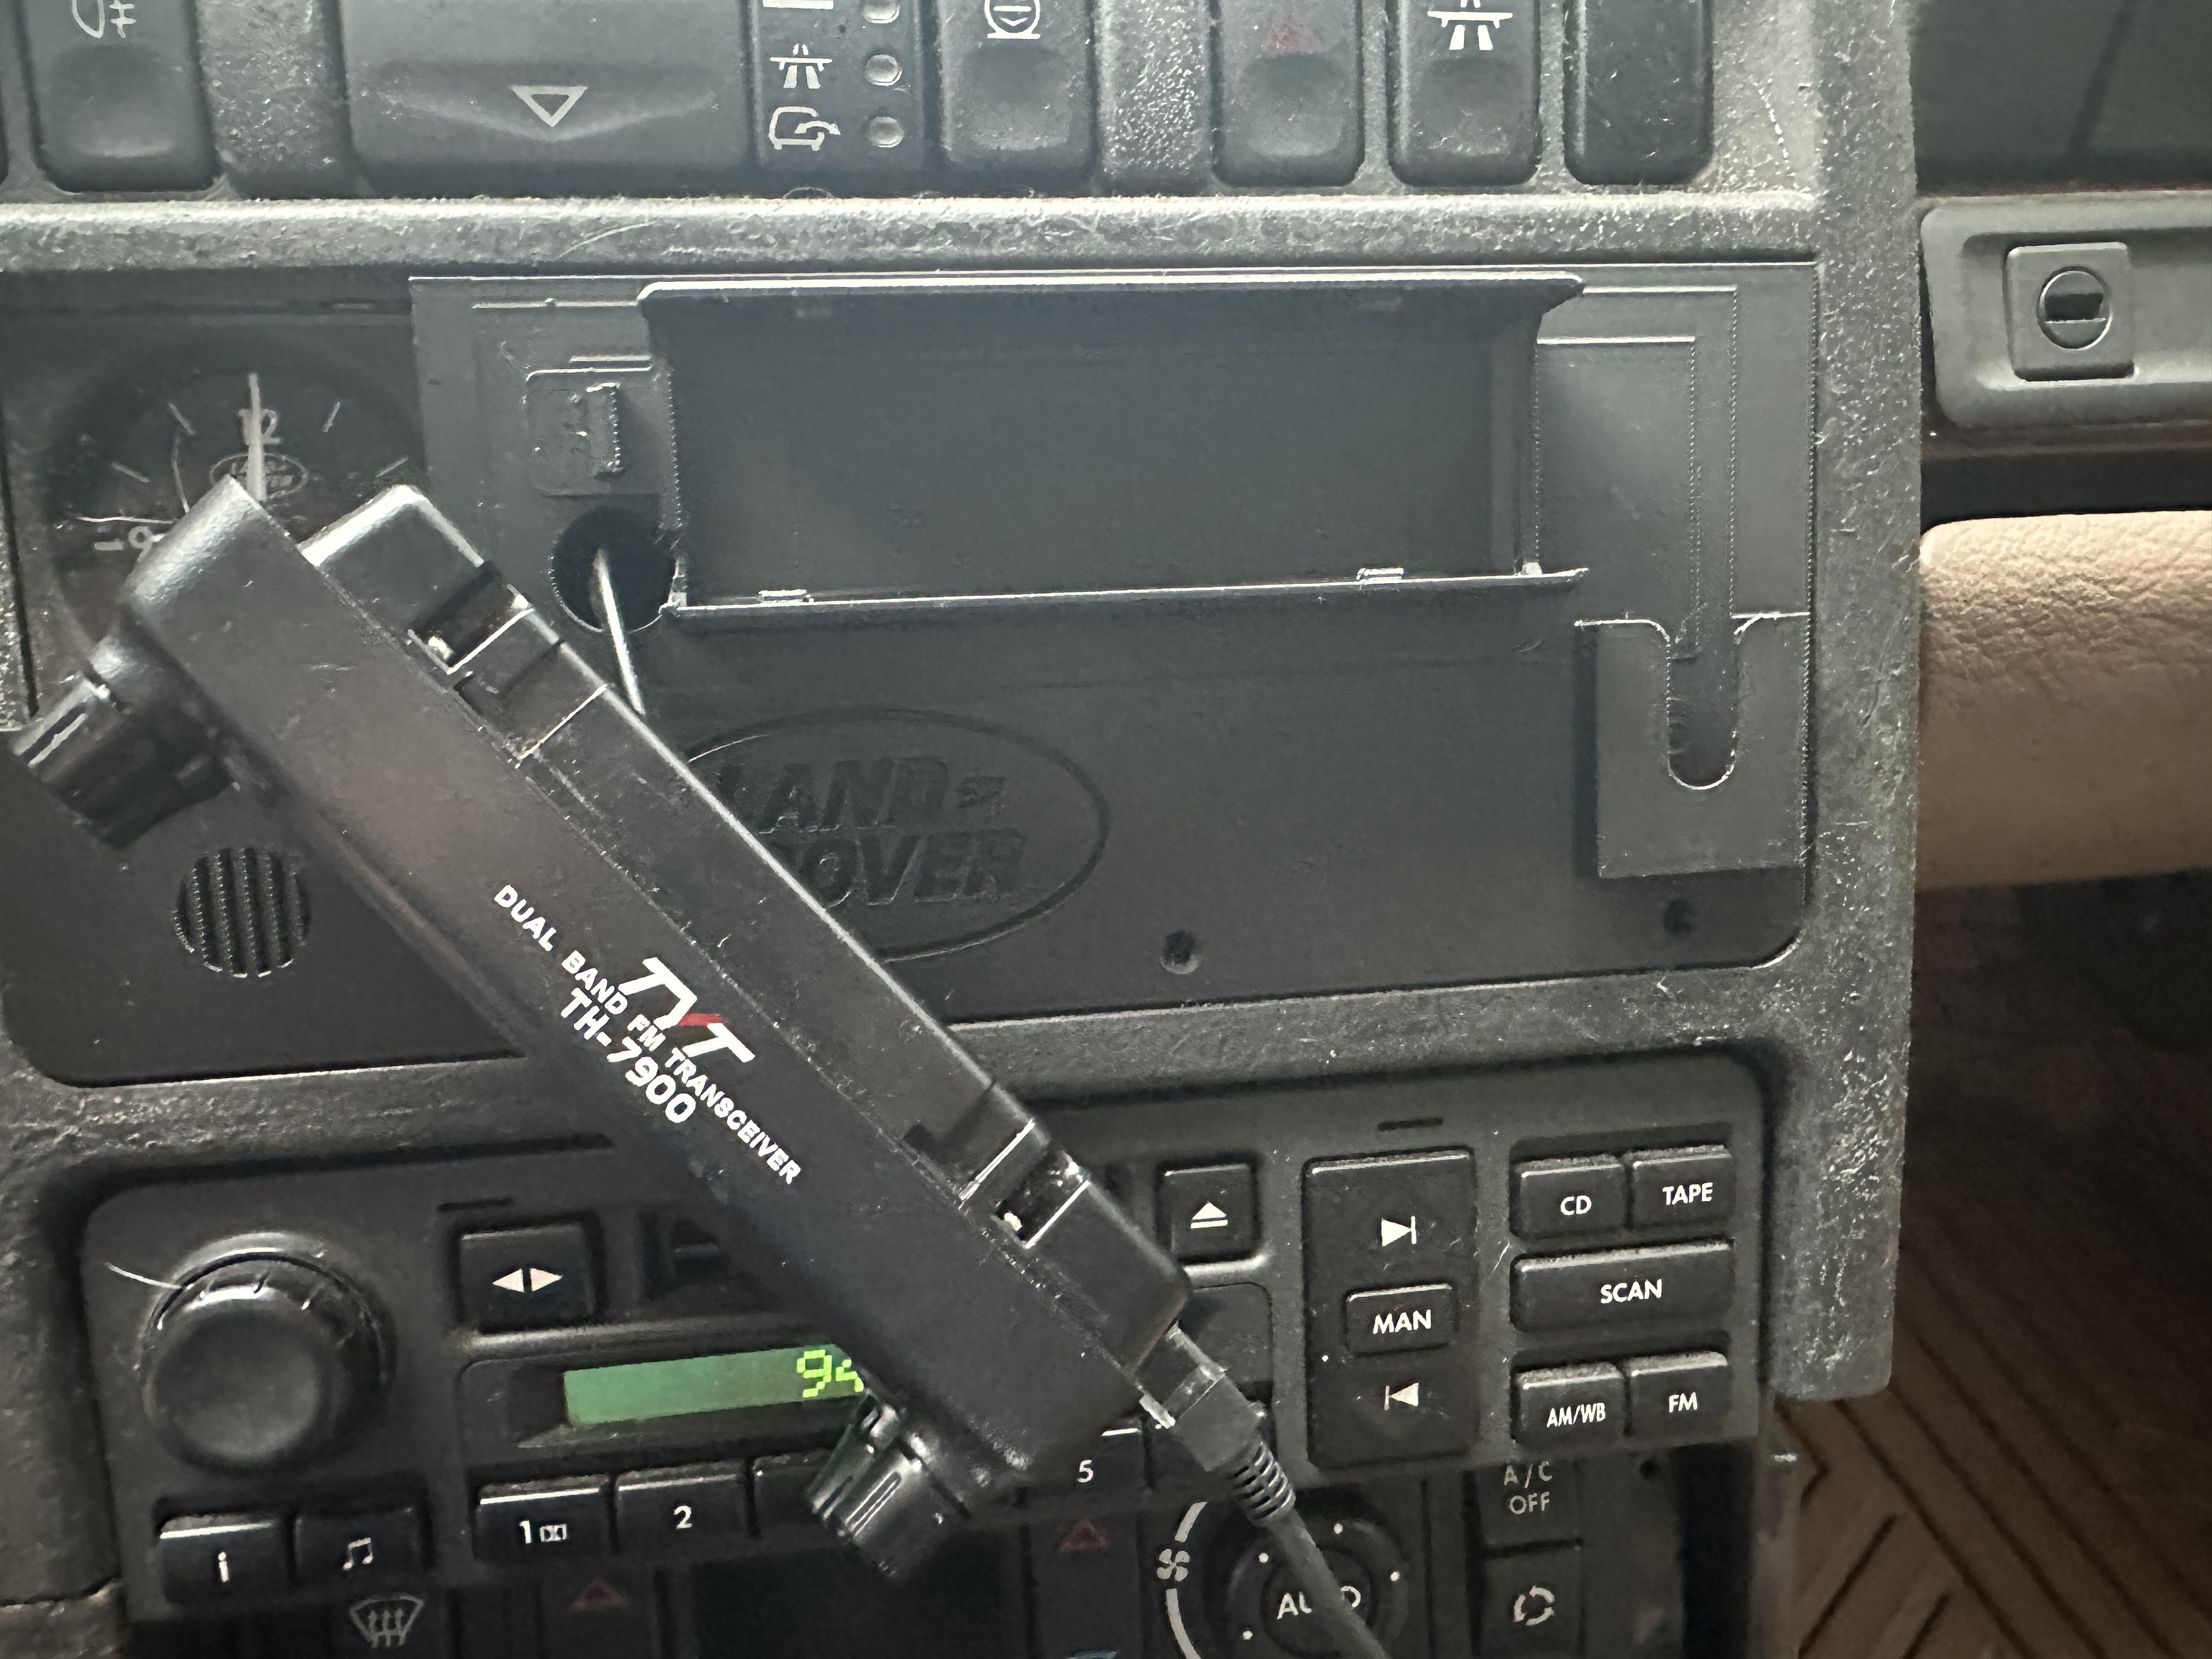
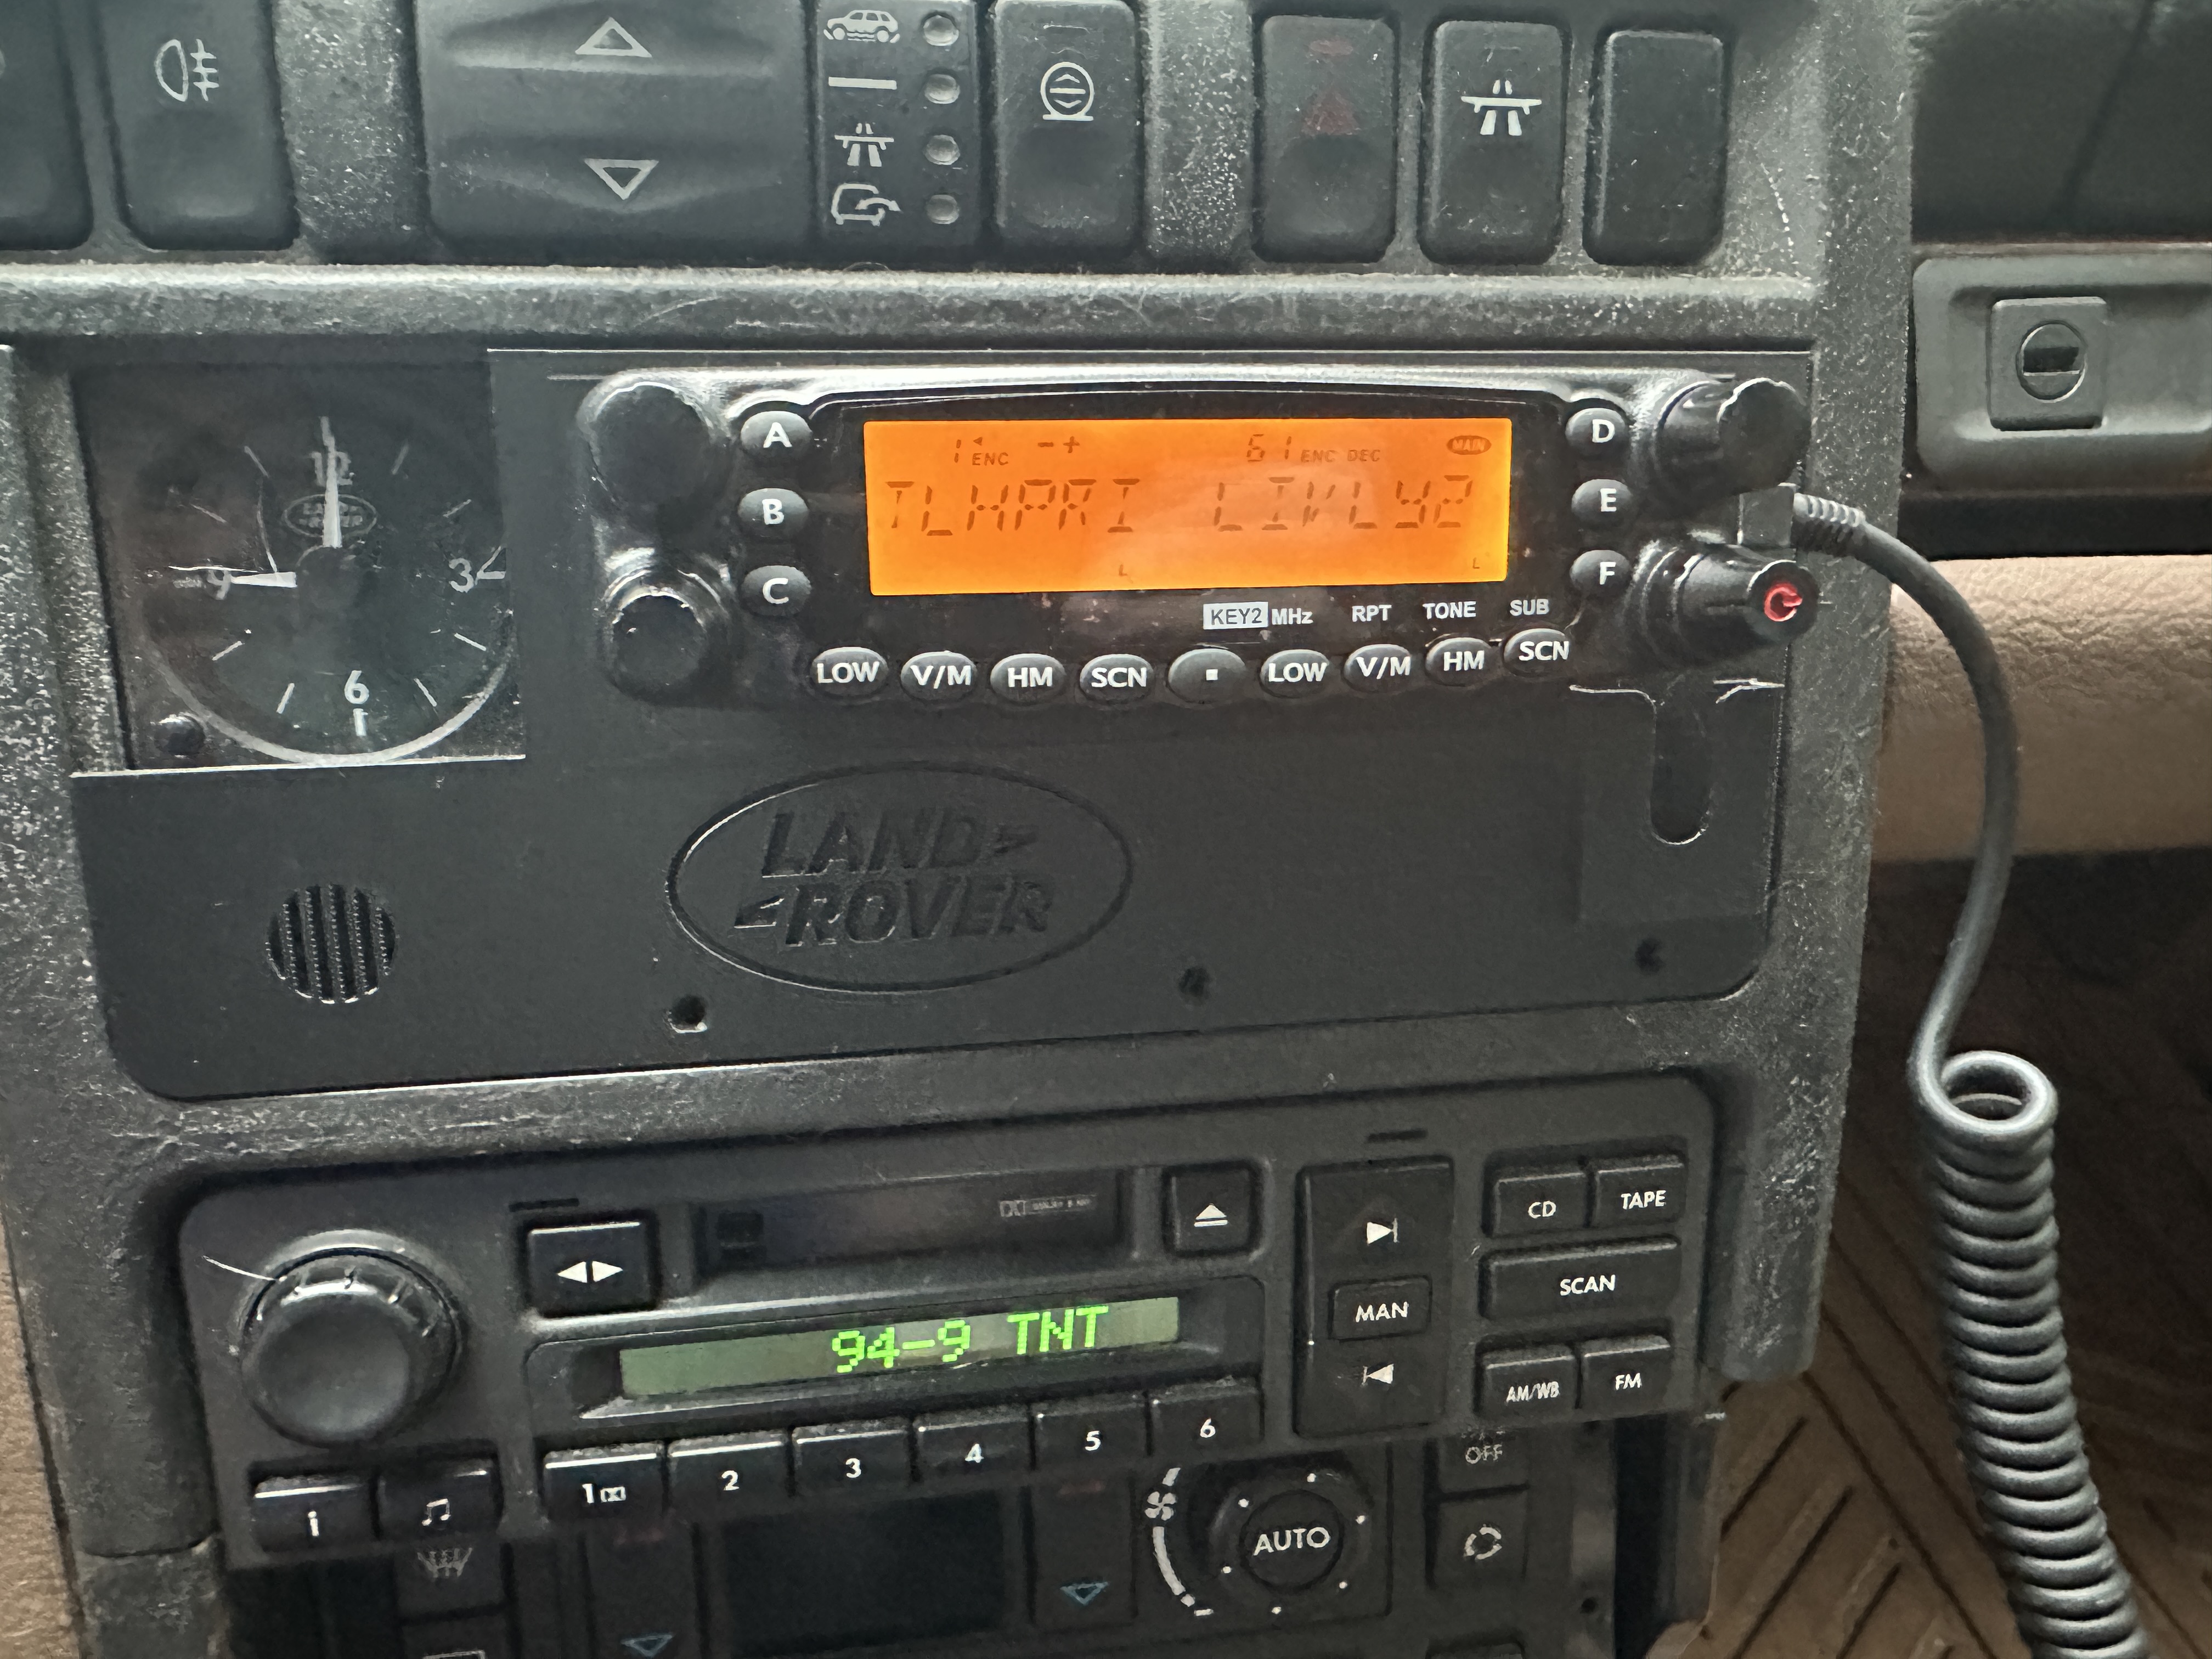
You can see the result in the photos below. It is a very rough part. I am not going to pretend otherwise. The seams between the two donor models are visible, the corners are not where a real designer would put them, and there is no chamfer or finesse anywhere on it. But it is printable, it bolts up to the console, and the radio head clicks into the bracket exactly the way it is supposed to.
For anyone trying this at home: P38_Panel_v5.1.stl is the working version. That is the one the radio head mounts to. The earlier versions (v4 and v5) are included in case anyone wants to see the iteration, but you can ignore them.
Interactive 3D Preview
Drag to orbit, scroll to zoom, right-click-drag to pan. This is the working v5.1 model:
Photos
The print itself, and the panel installed in the truck:
Downloads
If you have a TH-7900 and a P38, or you just want to remix this into something cleaner, here are the files I ended up with. They are released as-is, with all of the rough edges and questionable geometry that implies.
- P38_Panel_v5.1.stl — the working version (recommended)
- P38_Panel_v5.stl — earlier iteration
- P38_Panel_v4.stl — earlier iteration
Lessons
A few things I am taking away from this:
- You do not have to be a CAD person to make a working part. Two community STLs and Tinkercad got me a usable mount. It is not pretty. It works.
- Iterate against the actual hole, not the rendering. Every version that looked right in Tinkercad needed at least one adjustment after I held it up to the dash. Print, test, repeat.
- Credit the people who did the hard part. The two Thingiverse uploads are doing 90% of the work here. I just stitched them together for my specific install.
If anybody out there is trying to do the same thing in their P38 with a TH-7900, hopefully v5.1 saves you a few iterations. And if you are a real CAD person who looks at this and cannot stand it — please, by all means, remix it into something cleaner. I will be the first to download it.